So my first week challenge from the beautiful and talented Nicole was this Chevron Quilt the easy way from this link: http://www.scatteredthoughtsofacraftymom.com/2013/05/make-an-easy-chevron-quilt.html I picked out a skirt challenge for her. I know that doesn’t seem equitable but the particular pin that I chose for Nicole is one in which she had to draft a pattern from scratch. This is an awesome skill for any seamstress and I figured she was ready to give it a whirl. As you have already seen she rocked it out. She, in turn, knew that while I can sew a corset, or a 50s dress I have been putting off tackling quilting. So she pushed me out of my three dimensional comfort zone and into something a little more traditional, so onto my first experience quilting.
Of course I couldn’t just do things the easy way and put this together the size that the example was. I did the math and figured out how large I needed to make this quilt in order to use it on my queen size bed. Now it should be said at this point that math and I are not always friends. But I used a precut Queen sized (90”x108”) light weight cotton batting for my inner layer. So the outside dimensions were done for me I just had to work out the sizes for the blocks from there.
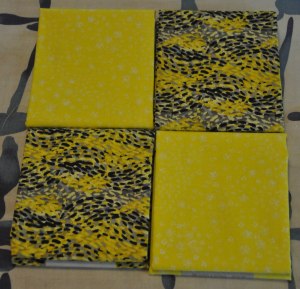
I have been totally obsessed with grey, white and yellow as a decorating color palette so those were the colors that I choose.
Unlike the example website I didn’t start with precut squares and had to cut my own, 112 of them to be precise. So I set about cutting, and cutting, and cutting 112 10.5 inch squares. While I am happy with the finished product cutting 112 of anything is TOTALLY BORING. Thank god for rotary cutters, a cutting mat and Netflix. I also cut a template to make things go a little bit quicker. It’s made out of foam core as that was the perfect thickness to run the rotary cutter against.
That’s a lot of squares!
I mated all the squares to one another, a yellow and a grey, right sides together and sewed a ¼ inch seam all the way around the outside. After an hour and a half I had a pile of 56 double layer squares.
Now in accordance with the directions I got out my handy dandy clear ruler and cut all the squares on the diagonal to give me 448 smaller squares that were half yellow and half grey triangles. Now I usually sew clothing which has some wiggle room as far as precision goes. Especially since I generally do a fitting to get everything spot on. With quilting precision seems to be key. I know that sounds like a DUH moment, but you really don’t realize how important being off just a millimeter or two is until you start to assemble these babies later on.
Now for the ironing, oh lord the ironing. I’m not a big fan of ironing anyway. So much so that I send dress shirts to the cleaner to be pressed. I would rather pay them $2.50 a shirt to do it then to have to mess with it myself. Unfortunately I didn’t think that I could take this pile of funny little triangles down to the local cleaners and drop them off with the instructions of “Light starch please.” So I pulled out the starch and the iron and set about pressing, and pressing, and pressing. The starch is key here as these squares are cut on the bias and you don’t want to end up with any of these pulled out of shape. It will really mess you up come assembly time.
Then it is all about setting up the pattern. I followed the layout in the example and it was easy to set up. That being said, I started with too many different patterns of fabric. This design would work better with a solid contrast that runs throughout the quilt, like the one in the example or with an even number of fabrics. For example: 4 fabrics, two of each color in the design. I ended up with some funky chevrons and blocks because I didn’t think the design through completely. I feel like I made it work as I assembled, but it was a make it work moment rather than something that was intentional.
Once you have your first set of blocks laid out, in my case this was nine blocks of 4 smaller squares across, it’s time to sew, and sew, and sew. Are you sensing a theme here? I paired up the upper and lower squares of each half block and then sewed them together into blocks and then into strips 9 blocks across.
Example: half block whole block
6-8 episodes of Scrubs later and I had a quilt top!
I decided to use a white on white patterned cotton as my backing. The fabric itself was just over 45” wide so I cut two lengths each 108” long and sewed them together down the middle.
I laid the backing fabric down on the floor in my living room right side down, set the cotton batting in the center and the quilt top right side up. With the help of our Great Dane Roman, and our cat Dusty I got everything laid out and pulled even. It should be said here that a Great Dane and an exceedingly stubborn cat are terrible sewing helpers. I pinned around the outside every 10 inches or so to make sure that the piece didn’t come too far out of square when I picked it up to take it back to the machine
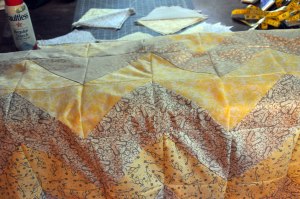
This picture was taken after 4 attempts to lay this all out together without the cat or the dog running through the middle of it or taking up residence.
Little did I know it was already a little out of square because of some of those millimeters that I mentioned earlier, remember those? Yeah, they are going to be a problem in just about 20 minutes. I used a premade grey quilt binding to go around the outside edge of the quilt. I mitered the corners and mated up the binding where needed around the outside edge.
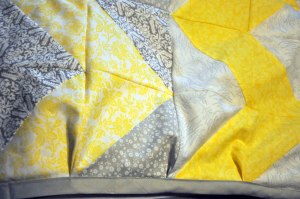
As I was in the home stretch all those millimeters started to add up and I suddenly found myself with about an inch more quilt top then I had binding or backing! So I fudged it and took 3 small tucks on the edge of the quilt to bring it back to square. Not perfect, but it works. I honestly can’t begin to imagine what I would have to do to make it square otherwise. That edge of the quilt is the lower right hand side so it won’t be too obvious.
You can see some of my odd squares, and the line down the middle where I have a much brighter yellow on yellow meeting up with a pattern that is more equally yellow and white. Some of my chevrons have not quite perfect points and some of my seams are off, some of them are WAY off, at least in quilting terms way off. Darn millimeters. These are all mistakes that I am more likely to notice then anyone, unless you are an awesome quilter, or a condescending fabric artist looking for mistakes.
I really like the way that the quilt turned out. I learned some very important things about precision cutting and sewing that I am sure will help me out in my day to day sewing business. I also learned to plot your quilt before you start so that you make sure you have the appropriate fabrics for the design. I have a new found respect for people that sew those amazing intricate quilts that look like works of art.
I come from a long line of seamstresses. My Grandma has sewn everything from quilts to Miss America dresses to suits for my Grandpa and a great many of my Easter dresses. My mom sews perfectly authentic dresses from the Italian Renaissance to ghost costumes from my childhood that looked like they belonged in a Broadway show, to beautiful wall hangings featuring her award winning embroidery designs. My Aunt Amy sews Victorian dresses from out of your dreams and sometimes your nightmares, modern jackets that have a flare for the theatrical, and costumes that have graced the stages of all the major theaters in the Twin Cities. These ladies have each inspired me in my design and ambition. Each one in their own way and on vastly different projects. This quilt project made me feel closer in spirit to my Grandma. I am sure that I will tackle another quilt, but not until after I call her to get some pointers.


